

This guitar course is designed for all ages and is used in small groups (3-6 students). This fun method is based on grades, which focuses on building a strong and balanced musical foundation that will help them in all styles of music in future years. The essence of this approach is to take important material and present it in a fun and exciting way so that music doesn’t become a chore for the student. By using simple melodies and patterns found in pop and rock, they will develop all the essential skills, Including Aural Training, Sight-Reading, Scale & Chord Knowledge, Rhythm Training, and Composition.
Group classes can be an excellent way to learn guitar. A group can consist of anywhere from three-six students. There are two approaches I use for group classes. The first is to teach everyone the same song. This can be very effective because everyone can help each other inside and outside the class, so if you are finding something difficult to play or remember, you’ll have someone else there to support you. The second approach involves giving out different guitar parts for one song. For example, If we had a group of four, we could give two people the melody line and two people the accompaniment. This is also a great way to do these classes as it adds a level of motivation to learn your parts, as it will be needed to play the song. Overall, group lessons are very fun and an excellent social activity!
Anyone can play music and it’s never too late to start! A more personal touch is used in the Adult Beginner course. Firstly, we will set realistic goals and create a program to learn guitar effectively, Secondly, we learn songs based on the music you love to listen to, such as blues, rock, country, classical, etc. This is an important factor as it helps to keep you motivated. Finally, I will provide solutions to any technical difficulties you will face as a guitar learner. Musicians face different challenges all the time when learning music, so as a beginner, it is important to get a good teacher to help you overcome these challenges with the greatest ease and provide you with useful strategies to continue to progress.
Grades can be helpful to measure your progress on an instrument and set achievable goals! Go through a course of guitar grades at your own pace with music that suits you. Grades are available for everyone to pursue and can be acquired through classical guitar, electric guitar, or acoustic guitar. Personally, I use Rockschool with most of my students. As a method, it covers a lot of important information which I can reinforce with supplementary material when needed. To check out Rockschool, please click here.
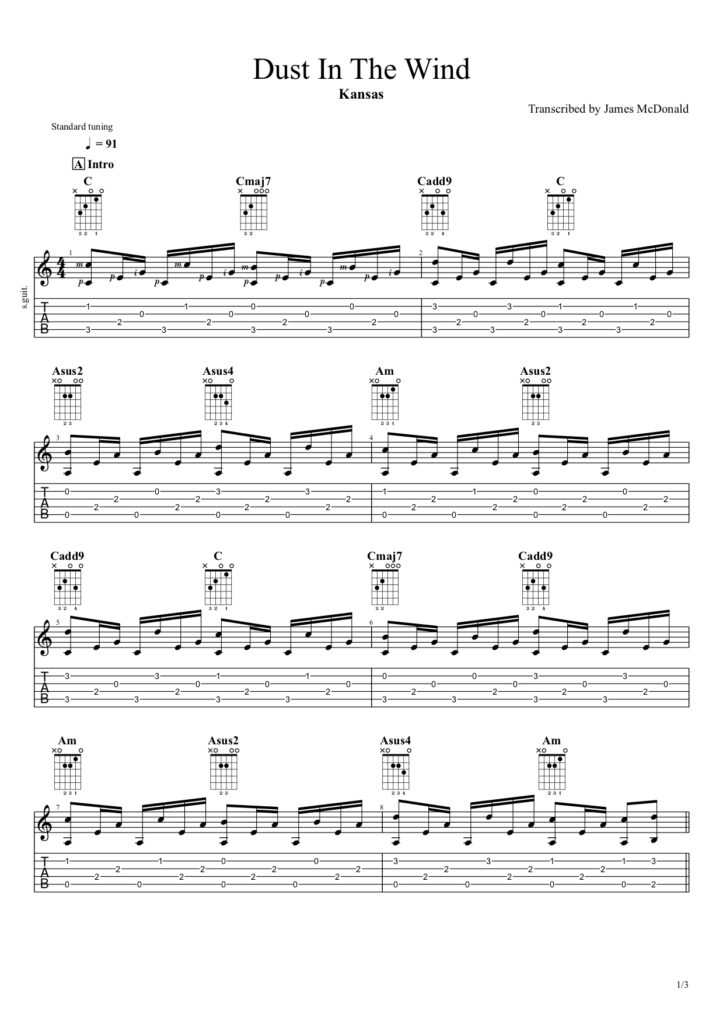
Currently, I teach various styles such as fingerstyle, classical, country, blues, rock, etc. These styles are taught on classical, acoustic, and electric guitar. Personally, I have such a wide taste in music so I am more than happy to listen to a new style or artist, figure it out teach it to whoever is interested. There is an example in the final tab “Example of Music” which shows how I will transcribe a song and notate it. This helps me to keep track of the large amounts of songs I have to do weekly and helps me to demonstrate it to students
It is optional to learn to read music as part of the lessons. When someone wants to learn a song, I prepare the music for them in this format. This is can be done for any song and as part of the lessons. You will be taught how to read this page of music, which consists of both standard music notation and guitar tablature. Learning to understand this information will assist you in learning songs correctly without the guitar teacher present and will also aid you in learning new songs by yourself.