Free mini-lesson
How to Read Guitar Chord Charts
One step at a time: how to read a guitar diagram, then how to read a chord box. No guitar needed.
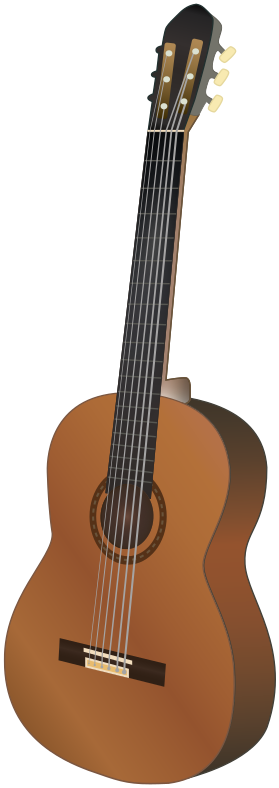
Guitar diagrams show a section of the fretboard — the part with the strings and frets (the silver strips across the neck). Most charts draw it standing upright, like this.
The thick line at the top is the nut. On a real guitar it's a small white or black strip at the top of the neck that the strings pass over.
The lines going down are the strings. It's as if the guitar is standing facing you, so the thickest string is on the left.
Diagrams are drawn for right-handed players. If you play left-handed, everything is a mirror image.
The lines going across are the frets — the silver strips on the neck. They're numbered from the top: the first is fret 1, the second is fret 2, and so on. Pressing a string just behind a fret changes its note.
From left to right, the strings are E, A, D, G, B and E. An easy way to remember them: Elephants And Donkeys Grow Big Ears.
ElephantsAndDonkeysGrowBigEars
Now try it on your own guitar. The thickest string is E for Elephants, the thinnest is E for Ears, and the four strings in between follow the phrase. Then find them in a random order, like this:
Donkeys, Big, Elephants, Grow, Ears, And, Grow, Elephants, Big, And, Ears, Donkeys
The trick: Always start from the E (Elephants) string and work your way through the phrase, saying each string name out loud and tapping the matching string as you go.
For example, if you're looking for the D string, say “E for Elephants” (tap E), “A for And” (tap A), then “D for Donkeys” (play D).
If you're looking for the B string, start again: “E for Elephants” (tap E), “A for And” (tap A), “D for Donkeys” (tap D), “G for Grow” (tap G), then “B for Big” (play B).
Don't skip ahead or guess. If you're even slightly unsure which string is which, always go through the full phrase. You don't want to accidentally practise the wrong string name.
The goal is to eventually recognise every string instantly, without having to think about it or use the phrase. Do this every day until you know them.
Then drop the words. Find them by letter name alone, in a random order:
D, high E, A, G, low E, B, A, D, B, high E, G, low E
Now try it here, by letter name alone.
Chord boxes use a few symbols that make them useful for describing chords. Start with the marks above the strings.
- ×An × above a string means don't play that string.
- ○A circle above a string means play that string.
Tap each string to hear the difference.
The last main symbol is the filled circle.
- ●Like the open circle, a filled circle sits on a string. The only difference is that it also sits behind a fret.
So it adds one piece of information:
- An open circle tells you which string to play.
- A filled circle tells you which string to play and which fret to press down.
The second diagram shows both: the G string, fret 2.
The last thing a chord box tells you is which finger to use. From here on, the filled circles have a number in them: the finger to press with.
If you're right-handed, chords are played with your left hand. It holds the neck and presses the strings down. Its fingers are numbered from the index finger, and the thumb is T.
If you play left-handed, it's your right hand, and every diagram is a mirror image.
If you've tried the piano lesson, you'll notice the fingers are numbered differently there. On guitar, the index finger is 1.
- 1Index
- 2Middle
- 3Ring
- 4Little
- TThumb
Your turn. Hold up your fretting hand so it looks like the picture. If you're right-handed, that's your left hand.
Now in a chord box. This filled circle is on the G string, behind fret 2, with a 1 in it: press it with finger 1, your index finger.
A chord can ask for any finger. Tap 2, 3 or 4 to see the same spot with a different finger.
One-Finger Chords
Start with one finger each. Only strum the strings that aren't crossed out.
Add a Second Finger
Keep the first finger where it was and add one more. Each chord now uses more strings and sounds fuller. E minor is already complete.
Three Fingers: the Full Chords
One more finger and C, G and D are complete — the shapes you'll find in any songbook.
That's the lesson done. You can read a chord chart: which string, which fret and which finger.
I hope you found this useful. If you got stuck somewhere, or you'd like to keep going, send me a message or book a call.
Illustrations: guitar by Medium69 (William Crochot), hand by Cy21, Wikimedia Commons, CC BY-SA.
Ready to Get Started?
Book a short call to talk through where you're at, what you'd like to achieve and which lesson option would suit you.